

How to Display a Coffee Mug Collection on Your Wall
A display coffee mug collection wall is a functional and decorative solution that turns everyday drinkware into a curated focal point in your kitchen or coffee nook. Unlike mugs buried in a cabinet, a wall display gives each piece visual presence while keeping your favorites within arm’s reach. Styling trends in 2026 favor ombre color gradients, thematic groupings, and gallery wall arrangements that treat mugs the same way you would framed art. Whether you own 10 mugs or 50, the right mounting method and a thoughtful layout make the difference between a cluttered shelf and a display worth showing off.
What do you need to display a coffee mug collection wall?
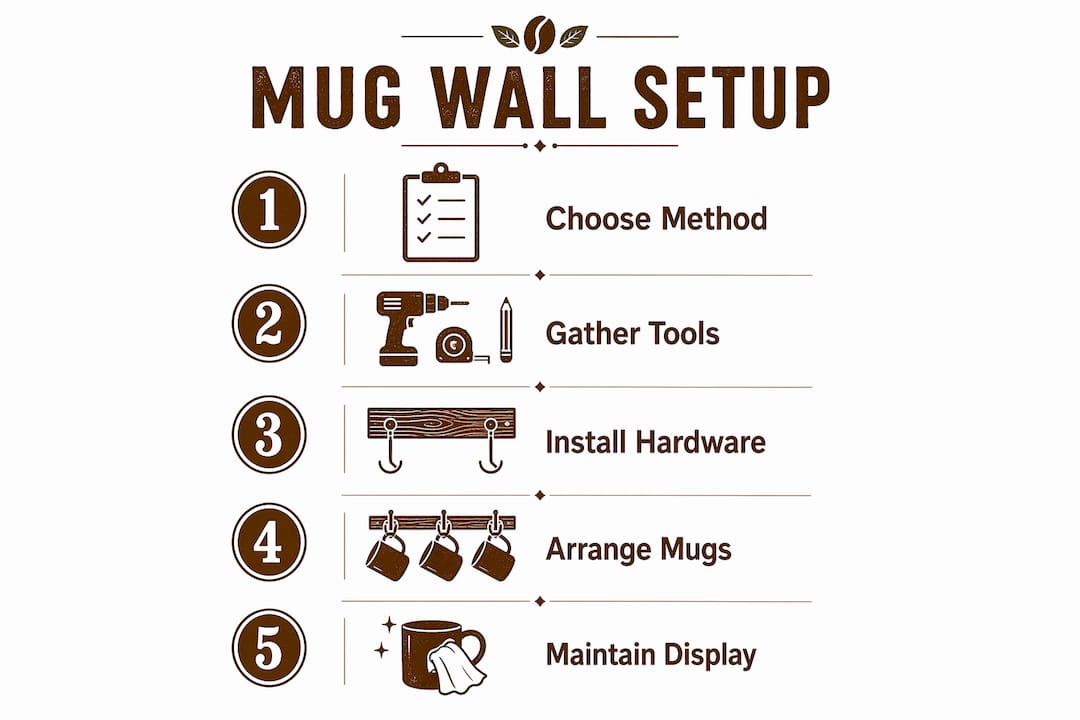
Before you hang a single hook, gather the right tools and materials. Rushing this step is the most common reason mug walls look uneven or fail structurally within months.
Tools you will need:
- Drill with bits sized for your wall anchors
- Level (a 24-inch level is more accurate than a small torpedo level)
- Tape measure
- Screwdriver
- Socket wrench with 1/2-inch and 3/4-inch sockets for installing cup hooks
Materials by display type:
The three most popular mounting approaches are pegboard kits, wood shelves with brackets, and direct wall hooks. Each suits a different collection size and skill level.
| Method | Best for | Complexity | Durability |
|---|---|---|---|
| Pegboard kit | 10 to 30 mugs, renters | Low | Medium |
| Wood shelves with brackets | 10 to 20 mugs per shelf | Medium | High |
| Direct cup hooks into studs | 20 to 50+ mugs | Medium to high | Very high |
| Adhesive-backed racks | 5 to 10 mugs, temporary | Very low | Low |
Pegboard kits can bear up to 60 pounds when weight is distributed evenly across hooks. That capacity covers most mid-size collections, but it drops sharply if you cluster all the weight on one side.
Pro Tip: Buy a few extra anchors and hooks before you start. Running out mid-installation means holes in your wall and a half-finished display while you wait for a hardware run.
For large collections of 40 or more mugs, a pegboard or adhesive solution will not cut it. You need furring strips screwed directly into wall studs, which distribute weight across the entire structure rather than relying on drywall anchors alone.
How do you design and organize your mug display for maximum impact?
Layout and styling decisions matter as much as the hardware. A wall covered in random mugs reads as clutter. A wall organized with intention reads as decor.

The most effective organizing principle is grouping by color. Arrange mugs in an ombre gradient from light to dark, or cluster warm tones on one side and cool tones on the other. Styling trends in early 2026 emphasize ombre effects and thematic groupings, which create a sense of visual flow that draws the eye across the entire display rather than stopping at individual pieces.
Grouping by shape or size is the second strongest approach. Tall mugs anchor the outer edges of a display. Shorter, wider mugs work well in the center or lower rows. Mixing heights without a plan creates a jagged roofline effect that feels unresolved.
Design experts advise treating a mug wall as an art gallery, with intentional empty space between pieces to let each mug breathe. Filling every hook is the fastest way to make a display feel overwhelming rather than curated.
A few more principles worth following:
- Leave at least one or two empty hooks in your layout so you have room to add new finds without rearranging everything
- Mix mug styles, such as handmade ceramics alongside printed mugs, for texture contrast
- Add a small plant, a bag of coffee beans, or a French press to the display to create a coffee station feel rather than a pure storage wall
- Rotate mugs seasonally to keep the display fresh and personally meaningful
Pegboard walls hold mugs and coffee tools like French presses and Moka pots on the same surface, which turns a mug display into a fully functional coffee station. That integration saves counter space and makes the display more useful, not just more attractive.
Pro Tip: Before committing to a layout, arrange your mugs on the floor in the same footprint as your wall space. Photograph it from above. That photo will save you from filling unnecessary holes.
If you want to build a collection worth displaying, Dkbeanleaf has a detailed guide on building a mug collection that covers how to curate pieces with long-term display value in mind.
How to install a coffee mug wall step by step
The installation process splits into two tracks depending on your collection size. Choose the method that matches how many mugs you plan to hang.
Easy installation: pegboard or adhesive rack
- Measure your wall space and mark the top and side boundaries with painter’s tape.
- Hold the pegboard against the wall and use a level to confirm it sits straight. Mark the mounting hole locations with a pencil.
- Drill pilot holes at each mark. Insert wall anchors if you are not hitting studs.
- Screw the pegboard to the wall using the provided hardware, checking level again after the first screw.
- Attach pegboard hooks in your planned layout before hanging any mugs.
- Hang mugs and adjust hook spacing as needed.
Heavier installation: furring strips and stud mounting
- Locate wall studs using a stud finder and mark each one with painter’s tape.
- Cut furring strips (1x3 or 1x4 lumber) to your desired display width.
- Pre-drill holes in the furring strips at stud locations.
- Screw furring strips horizontally into studs, spacing them 8 to 12 inches apart vertically.
- Mark hook placement across the strips using a tape measure and pencil, spacing hooks at least 4 to 5 inches apart.
- Use a socket wrench to install cup hooks. Insert the hook’s round end into a 1/2-inch or 3/4-inch socket and twist to drive it in straight. This method protects your fingers and produces a cleaner, more secure result than hand-screwing.
- Hang mugs and check that each hook is fully seated before loading the next one.
| Method | Time to install | Max load | Best wall type |
|---|---|---|---|
| Pegboard kit | 30 to 60 minutes | 60 lbs distributed | Drywall with anchors |
| Furring strip and hooks | 90 to 150 minutes | 100+ lbs | Drywall into studs |
| Adhesive racks | 10 to 20 minutes | 10 to 15 lbs | Smooth painted walls |
For large collections of 40 or more mugs, stud-anchored furring strips are the only installation method that handles the combined weight safely over time. Drywall anchors alone are not rated for that load.
Pro Tip: Use a socket wrench for cup hooks rather than your fingers. It takes a quarter of the time, reduces wrist strain, and keeps every hook at the same angle.
Common mistakes to avoid when creating a mug display wall
Even well-planned mug walls fail when a few basic rules get ignored. These are the mistakes that show up most often.
- Overloading hooks or anchors. Always check weight capacity before mounting any display solution. A pegboard rated for 60 pounds fails faster when all the weight concentrates on one section rather than spreading across the board.
- Forcing perfect symmetry. A grid of identical spacing looks more like a storage rack than a display. Mixing compartment sizes and leaving intentional gaps creates a curated, gallery-style look that symmetrical arrangements cannot achieve.
- Skipping the layout sketch. Installing hooks without a plan leads to extra holes, uneven spacing, and mugs that do not fit where you expected. Sketch your grid on paper first, using your largest mug’s dimensions as the unit of measurement.
- Ignoring wall type. Tile, plaster, and concrete each require different anchors and drill bits. Using drywall anchors in a plaster wall is a common cause of display failures.
- Never rotating the display. A static mug wall becomes invisible within weeks. Rotating mugs seasonally keeps the display feeling intentional and gives you a reason to engage with your collection rather than walk past it.
- Placing heavy mugs on outer hooks. Weight distribution matters. Put your heaviest mugs near the center of the display and closer to stud-anchored points, not on the edges where leverage increases stress on anchors.
Key takeaways
A well-executed mug display wall requires the right mounting method for your collection size, a deliberate layout, and proper weight distribution across anchors or studs.
| Point | Details |
|---|---|
| Match method to collection size | Use pegboard kits for under 30 mugs; use stud-anchored furring strips for 40 or more. |
| Organize by color or shape | Ombre gradients and size groupings create visual flow and prevent a cluttered look. |
| Use a socket wrench for hooks | A 1/2-inch or 3/4-inch socket installs cup hooks faster, straighter, and with less strain. |
| Check weight limits before mounting | Pegboard kits hold up to 60 lbs when weight is distributed evenly across the surface. |
| Rotate mugs seasonally | Seasonal updates keep the display feeling fresh and personally expressive. |
Why your mug wall will teach you more than any design guide
I built my first mug display wall with a basic pegboard kit and about 20 mugs. It looked fine for a week. Then I added more mugs, clustered them on one side, and the whole thing pulled away from the wall at 2 a.m. on a Tuesday. No damage, fortunately, but the lesson stuck.
What I learned is that the structural decisions matter more than the aesthetic ones, at least at the start. Get the anchoring right first. The styling is easy to adjust. A fallen display is not.
The second thing I learned is that perfect symmetry is a trap. My first layout was a precise grid. It looked like a pegboard in a hardware store, not a curated collection. The moment I started mixing heights, leaving gaps, and treating the wall like a gallery rather than a storage solution, the whole thing came alive. Asymmetry is not a mistake. It is the point.
I also stopped trying to display every mug I own. The mugs I rotate off the wall go into a cabinet, and the ones on the wall are the ones I actually want to look at. That edit made the display better and made me more deliberate about which mugs I buy. Dkbeanleaf’s guide on morning coffee rituals actually shifted how I think about this. The mugs you reach for first say something about your routine. Your wall should reflect that, not just fill space.
If you are customizing mugs to add to your display, the Dkbeanleaf DIY mug customization guide is worth reading before you commit to a design. A mug that looks great in your hand does not always photograph well on a wall.
— Kristopher
Build your display with mugs worth showing off

A mug wall is only as good as the mugs on it. Dkbeanleaf carries pieces designed with collectors and coffee lovers in mind, from handcrafted enamel mugs that add texture and warmth to any wall display, to travel mugs with handles that bring shape variety to your arrangement. If you pair your coffee display with a tea station, the Dkbeanleaf tea collection gives you options that complement both the mugs and the ritual. Every piece is chosen for people who take their coffee corner seriously.
FAQ
What is the best display for coffee mugs on a wall?
Pegboard kits work best for collections of 10 to 30 mugs because they are adjustable, easy to install, and can hold up to 60 pounds when weight is distributed evenly. For larger collections, furring strips anchored into wall studs provide greater load capacity and long-term stability.
How do I organize mugs on a wall display?
Group mugs by color, size, or theme for the most visually cohesive result. Ombre color gradients and mixed-height arrangements create a gallery-style look, while intentional empty spaces between mugs prevent the display from feeling overcrowded.
How many mugs can a pegboard wall hold?
A standard pegboard kit rated at 60 pounds holds roughly 15 to 25 average-sized ceramic mugs, depending on their individual weight. Distribute mugs evenly across the board rather than clustering them in one area to stay within the safe load limit.
Can I display a mug collection wall without drilling?
Adhesive-backed racks and Command-style hooks work for small collections of 5 to 10 lightweight mugs on smooth painted walls. They are not suitable for large or heavy collections because the adhesive load limit is too low for sustained weight over time.
How often should I update my mug wall display?
Rotating your display seasonally, roughly every three months, keeps the arrangement feeling fresh and gives you a reason to engage with your full collection. Seasonal updates also let you swap in mugs that match current decor themes or holidays without a full reinstallation.