

How to Customize a Coffee Mug at Home: DIY Guide
Customizing a coffee mug at home is one of the most satisfying DIY projects you can tackle, producing a personalized coffee mug that costs a fraction of what custom print shops charge. The three main methods are paint pens, vinyl decals, and sublimation printing. Each method uses different tools and delivers different results in terms of durability and visual impact. This guide walks you through every technique, from choosing the right mug to curing your design so it actually survives daily use.
What materials do you need to customize a coffee mug at home?
The method you choose determines your supply list, but every approach starts with the right mug. Ceramic and stoneware mugs work well for paint pens and vinyl. Sublimation requires a polymer-coated sublimation blank, which is a mug with a special white coating that bonds with sublimation ink under heat. Buying the wrong mug for sublimation is the single most common beginner mistake.
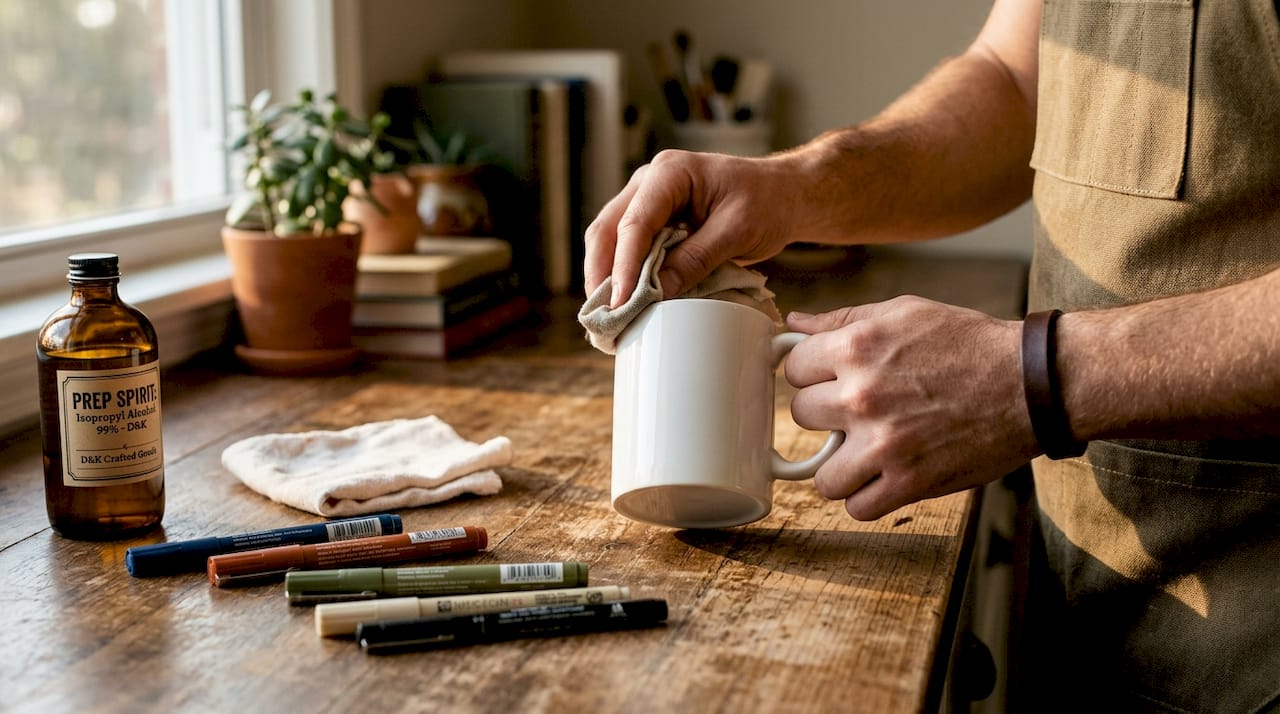
Surface preparation matters for every method. Wipe the mug with a rubbing alcohol pad before applying anything. Oils from your hands or residue from packaging will cause paint to bead, vinyl to peel, and sublimation transfers to shift. This one step takes 30 seconds and prevents hours of frustration.
Here is a quick comparison of what each method requires:
| Method | Mug type | Key tools | Curing method |
|---|---|---|---|
| Paint pens | Ceramic, oven-safe | Acrylic paint pens | Oven bake at 350°F |
| Vinyl decals | Ceramic, smooth surface | Cricut or Silhouette, weeding tool | Air cure 72 hours |
| Sublimation | Polymer-coated blank | Sublimation printer, heat press | Heat press 180-200°C |
For paint pens, Posca and Sharpie Oil-Based Paint Markers are the most widely used options. For vinyl, Oracal 651 permanent vinyl is the standard for smooth surfaces. For sublimation, a Sawgrass SG500 or Epson EcoTank with sublimation ink conversion are the two most accessible home setups.
How to customize a mug using paint pens
Paint pens are the most beginner-friendly method for DIY coffee mug designs. You do not need any cutting machines or special printers. A set of paint pens, a clean ceramic mug, and a home oven are all it takes.
Follow these steps for clean, lasting results:
- Test your mug first. Place an undecorated mug in a cold oven, heat to 350°F, and let it sit for 30 minutes. Oven-testing thrift mugs before decorating prevents cracking and shattering during the baking step. If the mug survives, it is safe to decorate.
- Shake your paint pens. Shake each pen for at least one minute, then press the tip on scrap paper until ink flows evenly. Shaking paint pens for a full minute prevents ink pooling and uneven lines on your design.
- Sketch your design lightly. Use a pencil or chalk marker to outline your design before committing with paint. Simple phrases, geometric patterns, and botanical doodles all work well on curved surfaces.
- Apply paint in thin layers. Let each layer dry completely before adding another. Thick applications crack during baking.
- Bake to set the paint. Place the finished mug in a cold oven, heat to 350°F, and bake for 30 minutes. Turn off the oven and let the mug cool inside before removing it.
- Wait 72 hours before washing. Even after baking, paint benefits from a full cure period before its first wash.
Pro Tip: Stick to 3 to 5 coordinated colors per mug. More colors create visual noise and make designs harder to execute cleanly. A two-color design with strong contrast almost always looks more polished than a rainbow approach.
How do vinyl decals work on mugs?
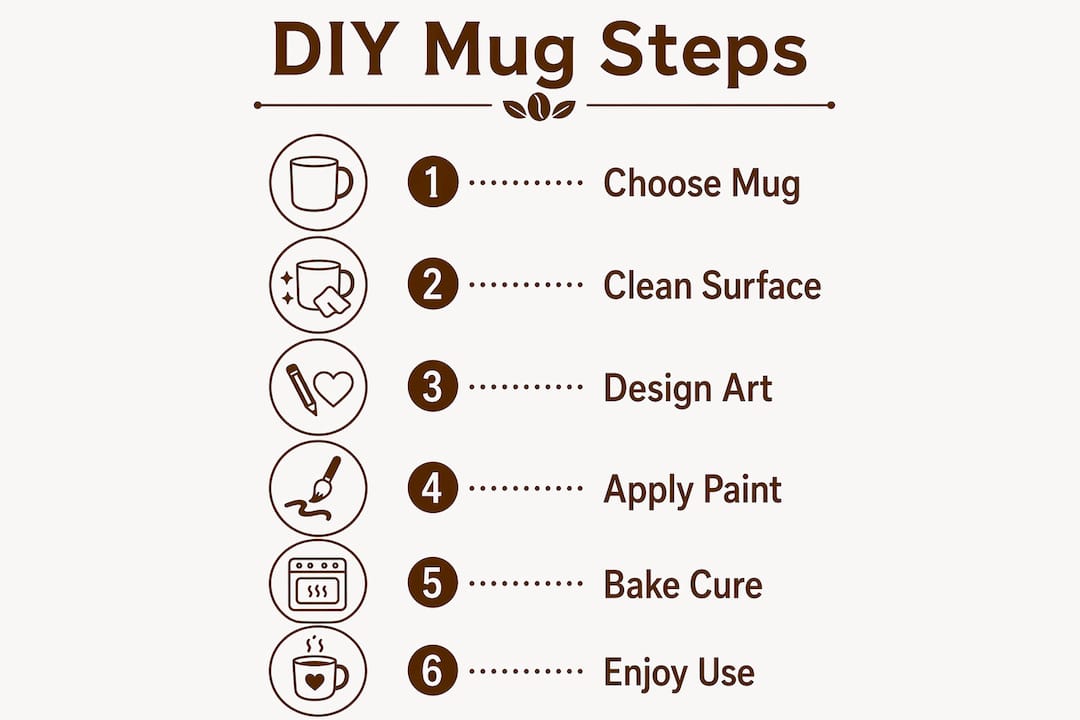
Vinyl decals give you crisp, professional-looking text and graphics without any painting skill. The tradeoff is that vinyl on mugs is not truly dishwasher safe over the long term. Vinyl mug durability depends on vinyl type, adhesive quality, application technique, and washing method. Hand-washing is the safest choice for any vinyl-decorated mug.
Here is what the application process looks like:
- Choose permanent vinyl. Oracal 651 is the go-to for mug surfaces. Removable vinyl peels off too easily under heat and moisture.
- Clean the mug surface. Wipe with rubbing alcohol and let it dry completely. Any moisture under the vinyl creates bubbles.
- Cut and weed your design. Use a Cricut Maker or Silhouette Cameo to cut your design, then remove the negative vinyl with a weeding tool.
- Apply transfer tape. Lay transfer tape over your weeded design, burnish it firmly, then peel the backing paper away slowly.
- Position and press. Place the design on the mug, burnish from the center outward to push out air bubbles, then peel the transfer tape at a low angle.
- Cure for 72 hours. A 72-hour curing period allows the adhesive to bond fully to the ceramic surface before the mug is used or washed.
Heat Transfer Vinyl (HTV) is an alternative that bonds more permanently under heat. You apply HTV with a heat press or a household iron set to the correct temperature for the vinyl type. HTV generally outlasts standard permanent vinyl on mugs because the heat bond is stronger than adhesive alone.
Pro Tip: Run a test wash on a sample piece before gifting or selling vinyl mugs. Micro-peeling after dishwasher exposure is common and often invisible until the second or third wash. A single test cycle reveals whether your application will hold.
How to create sublimation mugs at home
Sublimation produces the most vibrant, fade-resistant, and dishwasher-safe results of any home customization method. The process uses heat to convert sublimation ink from a solid directly into a gas, which bonds permanently with the polymer coating on the mug. The result is a design that is part of the mug surface, not sitting on top of it.
Follow these steps for consistent results:
- Use a polymer-coated sublimation mug. Standard ceramic mugs will not work. The polymer coating is what accepts the sublimation ink.
- Print a mirrored design. Your design must be printed in reverse using sublimation ink on sublimation paper. A Sawgrass SG500 or a converted Epson EcoTank with Hiipoo sublimation ink are reliable home options.
- Clean the mug surface. Wipe with a lint-free cloth and rubbing alcohol. Any dust or oil creates a barrier between the transfer and the coating.
- Wrap the transfer tightly. Lay the printed transfer face-down on the mug and secure it with heat-resistant tape on all edges. Tight wrapping with heat-resistant tape is critical. Any movement during pressing causes ghosting, which looks like a blurry double image.
- Press at the correct settings. Heat press temperatures of 180 to 200°C for 4 to 6 minutes are the standard range for sublimation mugs. A Cricut Mug Press automates this for 11 oz and 15 oz mugs.
- Cool and peel. Remove the mug carefully using heat-resistant gloves. Peel the transfer paper back slowly while the mug is still warm for the sharpest results.
Pro Tip: If you do not own a heat press, a convection oven at 400°F for 8 to 10 minutes works as a substitute. Wrap the mug in the transfer, place it on a baking rack, and rotate once halfway through. Results are slightly less consistent than a press, but the method works well for personal projects.
The sublimation method does require the highest upfront investment of the three approaches. A sublimation printer, sublimation ink, and a mug press or heat press represent a real cost. That said, vibrant, fade-resistant sublimation results make the investment worthwhile if you plan to create multiple mugs for gifts or personal use.
How do you make customized mug designs last longer?
Durability starts before you apply a single drop of paint or press a single piece of vinyl. Proper cleaning with alcohol and removing air bubbles are the two most critical steps for reducing peeling and fading over time. Skipping either one shortens the life of your design significantly.
Here are the practices that extend design life across all three methods:
- Follow manufacturer curing instructions exactly. Underbaking paint or skipping the vinyl cure period are the two most common causes of early design failure.
- Apply designs in thin layers. Thick paint cracks. Thick vinyl lifts at the edges. Thin, even application bonds better and looks cleaner.
- Avoid the dishwasher for paint pen and vinyl mugs. Hand-washing with mild soap is the safest option for both methods. Sublimation mugs are the only type that genuinely tolerates regular dishwasher use.
- Test before you commit. Run a decorated test mug through one wash cycle before gifting or using daily. This reveals adhesion problems before they become embarrassing.
“Dishwasher safety for decorated mugs depends on paint quality, decal application, and the curing process. No shortcut in preparation produces a shortcut in longevity.”
For long-term care, you can also explore dishwasher-safe mug guidance from Dkbeanleaf, which covers how different mug materials and coatings respond to repeated washing cycles.
Key takeaways
Sublimation is the most durable home customization method, but paint pens and vinyl deliver great results when properly cured and hand-washed.
| Point | Details |
|---|---|
| Match method to mug type | Sublimation requires polymer-coated blanks; paint pens and vinyl work on standard ceramic. |
| Prep the surface first | Wipe every mug with rubbing alcohol before applying any decoration to prevent peeling. |
| Cure time is non-negotiable | Allow 72 hours for vinyl adhesive bonding and follow oven instructions for paint pens. |
| Limit paint pen colors | Use 3 to 5 coordinated colors for cleaner, more cohesive designs with less frustration. |
| Hand-wash vinyl and paint mugs | Only sublimation mugs are reliably dishwasher safe; all others last longer with hand-washing. |
What I actually think about DIY mug customization
I have watched a lot of people start with sublimation because they want professional results immediately. Most of them get frustrated and quit before they figure out that ghosting is almost always caused by a loose transfer, not a bad printer. The fix takes 30 seconds. The lesson takes three ruined mugs to learn.
My honest recommendation: start with paint pens. The learning curve is low, the supplies are cheap, and the results are genuinely beautiful when you keep the design simple. A white glossy mug, two Posca paint pens in contrasting colors, and a clean phrase or botanical sketch will produce a gift that looks intentional and handmade in the best way.
Vinyl is the right choice when you need precise text or logos and you are willing to accept hand-washing as a permanent habit. Sublimation is the right choice when you want something that looks printed and survives real daily use. But neither method rewards impatience. The 72-hour cure, the oven test, the alcohol wipe. These steps feel unnecessary until the day you skip one and watch your design peel off in the sink.
The trend toward handmade, personalized mugs is not going away. People want objects that mean something. A mug with someone’s name, a shared joke, or a design you made yourself carries weight that a mass-produced product never will. That is worth the learning curve.
— Kristopher
Start your mug customization project with the right base
Every great personalized mug starts with a quality blank. Dkbeanleaf carries white glossy mugs that work with paint pens, vinyl, and sublimation methods, giving you a clean, smooth surface that holds decoration well. For a more rugged look, the enamel mug is a popular choice for outdoor-inspired gift projects. Browse the full mug collection to find the right base for your next DIY project. If you are building a gift set, pair a custom mug with a selection from the Dkbeanleaf tea collection for a complete, thoughtful present. You can also find creative mason jar gift ideas to round out your handmade gift packaging.
FAQ
What type of mug is best for home customization?
Smooth white ceramic mugs work best for paint pens and vinyl. Sublimation requires a polymer-coated sublimation blank specifically designed to bond with sublimation ink under heat.
How do you make paint pen designs dishwasher safe?
Bake the decorated mug in a cold oven at 350°F for 30 minutes, then let it cool inside the oven. Even after baking, hand-washing extends the life of paint pen designs significantly longer than machine washing.
Can you use a regular printer for sublimation mugs?
No. Sublimation requires a dedicated sublimation printer or a compatible inkjet printer converted with sublimation ink, such as an Epson EcoTank. Standard inkjet or laser ink will not bond with the mug coating under heat.
How long does vinyl last on a coffee mug?
Vinyl longevity on mugs depends on vinyl type, application quality, and washing method. Permanent vinyl like Oracal 651, applied cleanly and hand-washed, can last a year or more with regular use.
What causes ghosting in sublimation printing?
Ghosting occurs when the transfer paper shifts during pressing, creating a blurry double image. Securing the transfer tightly with heat-resistant tape on all edges before pressing eliminates this problem in most cases.