

How Ceramic Mugs Are Made: A Craft Enthusiast's Guide
A ceramic mug is a functional pottery vessel shaped from clay, then fired and glazed to achieve durability and water resistance. Understanding how ceramic mugs are made gives hobbyists a real advantage. Whether you work with stoneware, earthenware, or porcelain, every mug passes through the same core stages: clay preparation, shaping, drying, bisque firing, glazing, and glaze firing. The tools involved range from a pottery wheel and kiln to a simple needle tool. Get these steps right, and you produce a mug that holds heat well, feels balanced in the hand, and lasts for years.
What are the primary materials and clay types used in ceramic mug making?
Clay selection is the single most consequential decision in the ceramic mug manufacturing process. The three main clay bodies are stoneware, earthenware, and porcelain, and each behaves differently in the kiln and in daily use.
Stoneware is the most popular choice for mugs. It fires at high temperatures, produces a dense and chip-resistant body, and tolerates the thermal stress of hot beverages. Most studio potters and small-batch producers default to stoneware for exactly these reasons.

Earthenware fires at lower temperatures and produces a more porous body. It is easier for beginners to work with, but it requires a thorough glaze coat to become waterproof. Unglazed earthenware absorbs liquid and can harbor bacteria over time.
Porcelain is the most refined of the three. It fires white, translucent, and very hard. Porcelain demands more skill to throw and shape because it is less forgiving of uneven pressure. The payoff is a mug with a clean, smooth surface that shows off detailed decoration beautifully.
Before any shaping begins, the clay must be wedged. Wedging removes air pockets and creates a uniform moisture content throughout the clay body. Air pockets left in clay expand during firing and cause cracks or explosions in the kiln. Proper wedging takes 5–10 minutes of firm, rhythmic kneading on a plaster or canvas surface.
One critical measurement every hobbyist must account for is clay shrinkage of 10–15% during drying and firing. That means a mug you shape at 4 inches tall may finish closer to 3.4–3.6 inches. Plan your dimensions with this shrinkage built in from the start.
- Stoneware: Dense, durable, best for everyday mugs, fires at cone 6–10
- Earthenware: Porous, beginner-friendly, requires full glaze coverage, fires at cone 04–06
- Porcelain: Smooth, translucent, advanced skill required, fires at cone 6–10
- Moisture content: Clay should feel like firm leather before shaping begins
- Wedging: Always wedge for at least 5 minutes to eliminate air pockets
What are the main shaping techniques for ceramic mugs?
Three techniques dominate the ceramics mug crafting world: wheel throwing, slab building, and slip casting. Each suits a different skill level and production goal.
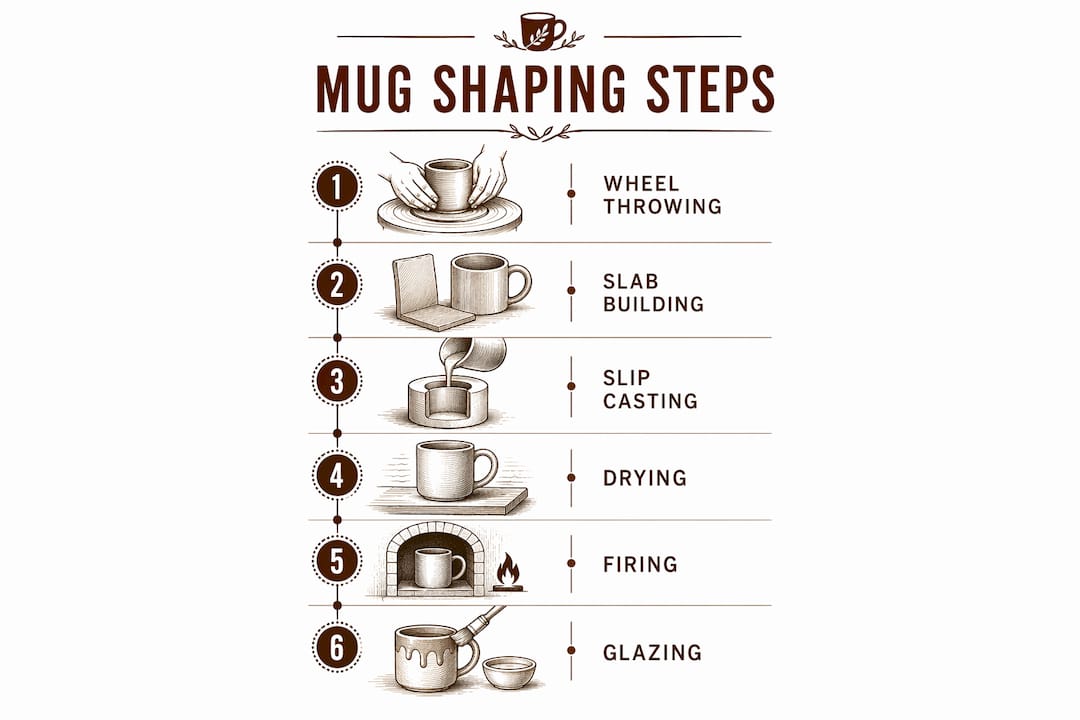
Wheel throwing
Wheel throwing is the classic method and the one most hobbyists picture when they think about pottery. Here is the step-by-step process:
- Center the clay. Place a wedged ball of clay on the wheel head and press it into the center while the wheel spins. Off-center clay produces uneven walls.
- Open the base. Push your thumbs down into the center of the clay to create the floor of the mug. Leave at least 6–7mm of clay at the base.
- Pull the walls. Use your fingers inside and outside the clay to pull upward, thinning and raising the walls. Repeat in smooth, controlled passes.
- Check wall thickness. A needle tool verifies uniform wall thickness by measuring depth from outside to inside. Target 6–7mm throughout. Walls thinner than 4mm crack easily; walls thicker than 10mm fire slowly and feel heavy.
- Shape and refine. Use a rib tool to compress the outer wall and smooth the surface. Define the rim with wet fingers.
- Wire off and dry. Cut the mug from the wheel head with a wire tool. Allow it to stiffen to leather-hard before attaching a handle.
A standard 12-ounce mug uses a 6–7mm wall thickness and a 3.5-inch base diameter. These measurements give you a reliable starting point regardless of clay type.
Slab building
Slab building suits hobbyists who prefer a more geometric, controlled form. Roll out a slab to a consistent 6mm thickness using guide sticks. Cut the slab to approximately 11 x 4 inches for a standard mug body. Slab-built mugs require beveled edges and careful joining with slip and scoring for structural integrity. Press firmly along every seam to compress the join and eliminate gaps.
Slip casting
Slip casting pours liquid clay (slip) into a plaster mold. The mold absorbs moisture from the slip, leaving a clay shell that matches the mold’s interior. This method dominates mass production because it replicates shapes exactly. For hobbyists, it requires purchasing or making plaster molds, which adds cost and setup time.
Pro Tip: Use a needle tool to poke through the wall at several points while throwing. If the needle exits cleanly at the same depth every time, your walls are even. Inconsistent depth means you need another pull.
How is drying, firing, and glazing done to create a finished ceramic mug?
The finishing stages are where most beginner mistakes happen. Rushing drying or firing is the fastest way to crack or warp a mug you spent hours shaping.
Drying
Slow, even drying prevents the two most common defects: S-cracks and warping. Leaving a formed mug on its mold too long causes clay to shrink around the mold, making removal difficult and risking cracks. Cover the mug loosely with plastic sheeting and allow it to dry over 24–48 hours. Remove the plastic gradually to let moisture escape evenly.
- S-cracks: Form when the base dries faster than the walls. Slow the base drying by placing the mug on a piece of foam or dry newspaper.
- Warping: Caused by uneven drying or uneven wall thickness. Rotate the mug periodically during drying.
- Leather-hard stage: The correct moment for handle attachment and trimming. Clay is firm but still slightly flexible.
- Bone dry: Fully dried clay before firing. Handle with care. Bone-dry clay is fragile.
Bisque firing
Bisque firing converts raw clay into a porous, hardened ceramic. Bisque firing temperatures run 1,800–2,000°F (982–1,093°C). This stage burns off organic material and water chemically bonded in the clay. The result is a bisqueware mug that is strong enough to handle but still porous enough to absorb glaze.
Glazing and glaze firing
Glaze is a glass-forming coating applied to bisqueware. It creates the waterproof, food-safe surface that makes a ceramic mug functional. Apply glaze by dipping, pouring, or brushing. Keep the bottom 6mm of the mug unglazed so it does not fuse to the kiln shelf. Glaze firing reaches higher temperatures than bisque firing, melting the glaze into a smooth, sealed layer. Always use food-safe, non-toxic glazes. Lead-free, commercially tested glazes are the standard for any mug that will hold beverages. Understanding why mugs keep drinks warm comes down to this fired ceramic body and glaze combination working together.
What are the essential craftsmanship considerations for handle attachment and finish quality?
Handle attachment is where many hobbyists lose an otherwise well-made mug. A handle that cracks off in the kiln or sags during drying is almost always the result of poor timing or weak slip.
The correct moment to attach a handle is the leather-hard stage. At this point, the mug body and the handle have similar moisture content, which means they shrink at the same rate during drying. Attaching a wet handle to a dry mug body creates a moisture mismatch. The handle shrinks while the body does not, and the join cracks.
Proper handle attachment requires scoring and a magic slip made from clay, water, and a small amount of vinegar. Score both the mug wall and the handle ends with a serrated tool, apply magic slip to both surfaces, then press firmly and smooth the join. Magic slip acts as a strong adhesive that bonds the clay surfaces at a molecular level.
Pro Tip: After attaching the handle, cover the entire mug loosely with plastic for 24 hours. This slows drying and lets the handle and body reach the same moisture level before you remove the cover.
Ergonomic handle shaping matters as much as the join. A handle should allow two or three fingers to pass through comfortably. The curve should align with the natural grip position so the mug feels balanced when full. For a standard mug size, a handle that extends roughly 2.5 inches from the mug wall gives most hands a comfortable grip.
- Score deeply: Use a serrated tool or fork to create a crosshatch pattern at least 3mm deep on both surfaces.
- Magic slip consistency: Should resemble thick yogurt. Too watery and it will not bond; too thick and it traps air.
- Smooth the seam: Blend the join with a damp finger or small silicone tool to eliminate visible gaps.
- Clean the rim: Wipe the rim with a damp sponge before bisque firing to remove any rough edges.
How does commercial ceramic mug production compare with artisanal pottery methods?
Factory production and studio pottery share the same basic chemistry but operate at completely different scales and timelines.
Mass production uses milling, slip casting with plaster molds, controlled moisture, and in-line gauging to produce consistent results across thousands of units. Every variable is documented and monitored. Manufacturing experts note that documented process controls like moisture management and dimensional checks distinguish reliable mass production from occasional success. A hobbyist who tracks these same variables, even informally, produces far more consistent results than one who works by feel alone.
| Factor | Commercial production | Artisanal pottery |
|---|---|---|
| Shaping method | Slip casting with plaster molds | Wheel throwing or slab building |
| Output per day | Hundreds to thousands of units | 10–30 mugs per session |
| Consistency | Controlled by in-line gauging | Varies by skill and attention |
| Timeline | Sample: 10–25 days; bulk: 25–45 days | Days to weeks per batch |
| Unique character | Minimal | High |
| Quality control | Automated dimensional checks | Manual inspection by the potter |
The key lesson for hobbyists is this: factories succeed through documentation, not talent. Write down your clay weight, wall thickness measurements, drying times, and firing temperatures for every batch. That record becomes your quality control system.
Key Takeaways
The ceramic mug production process succeeds when clay selection, precise shaping, controlled drying, and correct firing temperatures work together as a single system.
| Point | Details |
|---|---|
| Clay selection determines durability | Stoneware is the best choice for everyday mugs due to its density and chip resistance. |
| Account for shrinkage from the start | Clay shrinks 10–15% during drying and firing, so build larger dimensions into your initial shaping. |
| Wall thickness controls quality | Target 6–7mm walls throughout; below 4mm cracks, above 10mm fires unevenly. |
| Handle attachment timing is critical | Attach handles at the leather-hard stage using scored surfaces and magic slip to prevent cracking. |
| Document every variable | Tracking clay weight, drying time, and firing temperature produces consistent results across batches. |
What I have learned from years of watching potters get this wrong
Pottery instructor Ian Adair puts it plainly: functional mugs test a potter’s precision more than decorative pieces because they must maintain balance and survive kiln stresses. I have seen this play out repeatedly. Beginners obsess over surface decoration and ignore wall thickness. They produce beautiful-looking mugs that crack in the kiln or feel clumsy in the hand.
The hardest lesson to teach is patience during drying. Every beginner wants to move to the next stage. Rushing a mug from shaping to bisque firing without a full slow dry is the single most common cause of cracking. A mug that takes three days to dry properly is a mug that survives firing.
Handle attachment is the second place beginners consistently fail. The magic slip recipe is not optional. Plain water slip does not create a strong enough bond. The vinegar in magic slip lowers the pH and helps the clay surfaces fuse more completely. Skip it and you will pull finished mugs from the kiln with handles sitting loose on the shelf beside them.
My honest recommendation for hobbyists: buy a needle tool and use it obsessively. Check wall thickness at every stage of throwing. It costs almost nothing and eliminates the guesswork that causes most beginner failures.
— Kristopher
Ceramic mugs and teas worth drinking from
If the ceramic mug production process has deepened your appreciation for a well-made mug, Dkbeanleaf carries a range of mugs built for serious coffee and tea drinkers.

The white glossy mug is a clean, classic option that shows off the glaze work that makes ceramic mugs functional and beautiful. For something with more character, the enamel mug brings a different fired finish suited to everyday use. Pair either mug with a selection from the Dkbeanleaf tea collection, which includes options like Hibiscus Berry Tea designed to complement the ceramic drinking experience. These are mugs and teas chosen for people who care about what goes into both.
FAQ
What clay is best for making ceramic mugs?
Stoneware is the best clay for ceramic mugs because it fires dense, resists chipping, and handles thermal stress from hot beverages. Porcelain works well for advanced potters who want a refined finish.
How thick should ceramic mug walls be?
Mug walls should measure 6–7mm for the best balance of strength and weight. Walls below 4mm crack easily, and walls above 10mm fire unevenly and feel heavy.
What temperature is used for firing ceramic mugs?
Bisque firing runs 1,800–2,000°F (982–1,093°C), followed by a higher-temperature glaze firing that seals the surface and creates a food-safe finish.
Why do ceramic mug handles crack off?
Handles crack when they are attached at the wrong moisture stage or without proper scoring and magic slip. Attaching a handle at the leather-hard stage with scored surfaces and a clay-water-vinegar slip prevents this failure.
How long does it take to make a ceramic mug from start to finish?
A handmade studio mug takes several days from shaping to finished glaze firing when drying time is included. Commercial production timelines run 10–25 days for samples and 25–45 days for bulk orders, not counting shipping.