

Cold Brew Coffee at Home: Simple Gadget-Free Guide
Cold brew coffee at home is defined as steeping coarsely ground coffee in cold or room-temperature water for 12–24 hours, producing a smooth, low-acid concentrate you can customize and drink all week. The process requires no special machines, no heat, and no barista training. What you get is a coffee that is 67% less acidic than hot-brewed coffee, making it a strong choice for anyone with a sensitive stomach or a preference for naturally sweet, mellow flavor. This guide covers equipment, ratios, step-by-step brewing, customization, and troubleshooting so you can nail your first batch.
What equipment do you need for cold brew coffee at home?
A mason jar and a fine mesh strainer are all you need to make excellent cold brew. Expensive gadgets add convenience, not better flavor. That is the most liberating fact in home brewing. You probably already own everything required.
The core tools
- Mason jar or large pitcher: A 32-ounce mason jar handles a standard batch. A 64-ounce wide-mouth jar works better if you brew for the whole week.
- Fine mesh strainer: Catches most of the grounds on the first pass.
- Cheesecloth or paper coffee filter: Used for the second pass to remove fine particles and produce a clean, smooth cup.
- Kitchen scale: Weighing coffee and water gives you repeatable results. Volume measurements vary too much batch to batch.
Choosing the right coffee
Roast level matters more than most guides admit. Medium to dark roasts produce the chocolate, caramel, and nutty notes that cold brew is known for. Light roasts can work, but they tend to produce a thinner body and more acidic flavor profile, which partly defeats the purpose.
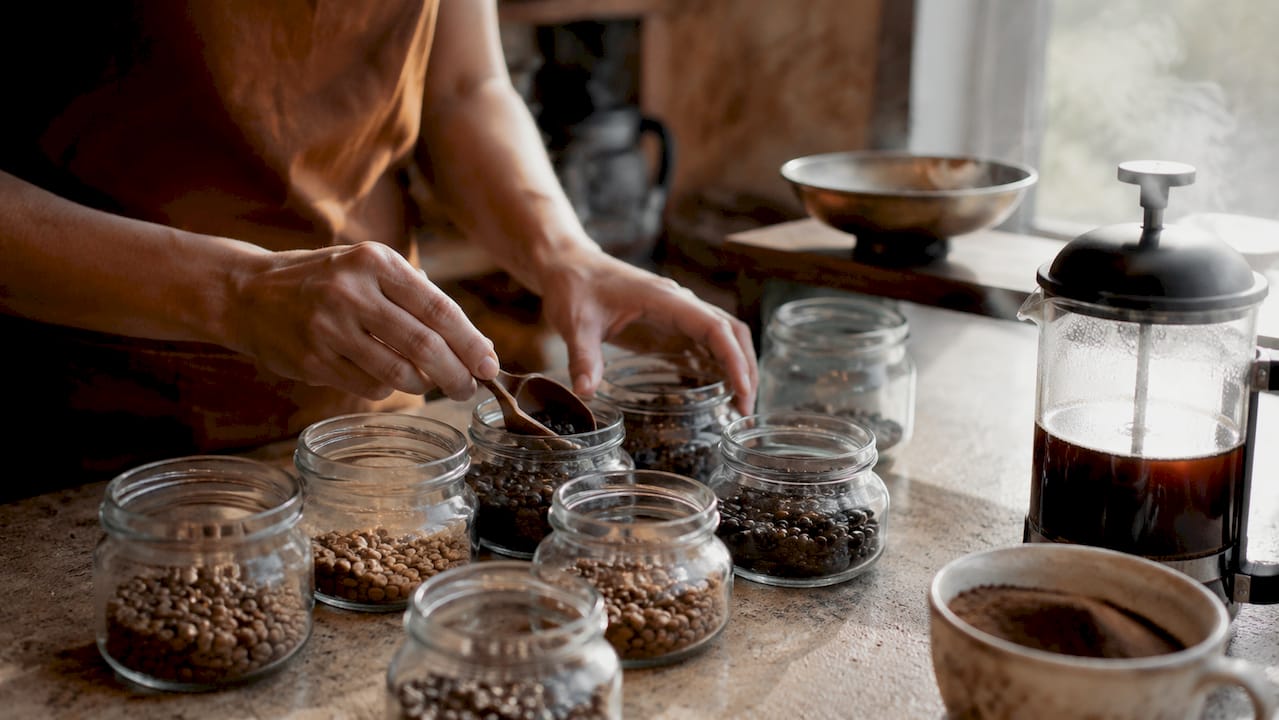
Grind size is non-negotiable. You need a coarse grind, roughly the texture of raw sugar or coarse sea salt. Fine grinds over-extract and turn bitter. They also clog your filter and produce a muddy, gritty cup.
| Grinder Type | Result | Recommendation |
|---|---|---|
| Burr grinder | Consistent coarse grind | Best choice for cold brew |
| Blade grinder | Uneven mix of fine and coarse | Acceptable if you sift out fines |
| Pre-ground (coarse) | Convenient, less fresh | Works in a pinch |
Pro Tip: If you only have a blade grinder, pulse in short bursts and shake the grinder between pulses. You will get a more even grind than a single long run.
Any single-origin or blend labeled “cold brew” or “French press grind” at your local coffee shop or grocery store will work well. The key is freshness. Coffee ground more than two weeks ago will produce a flat, dull brew regardless of your technique.
How do you make cold brew coffee step by step?
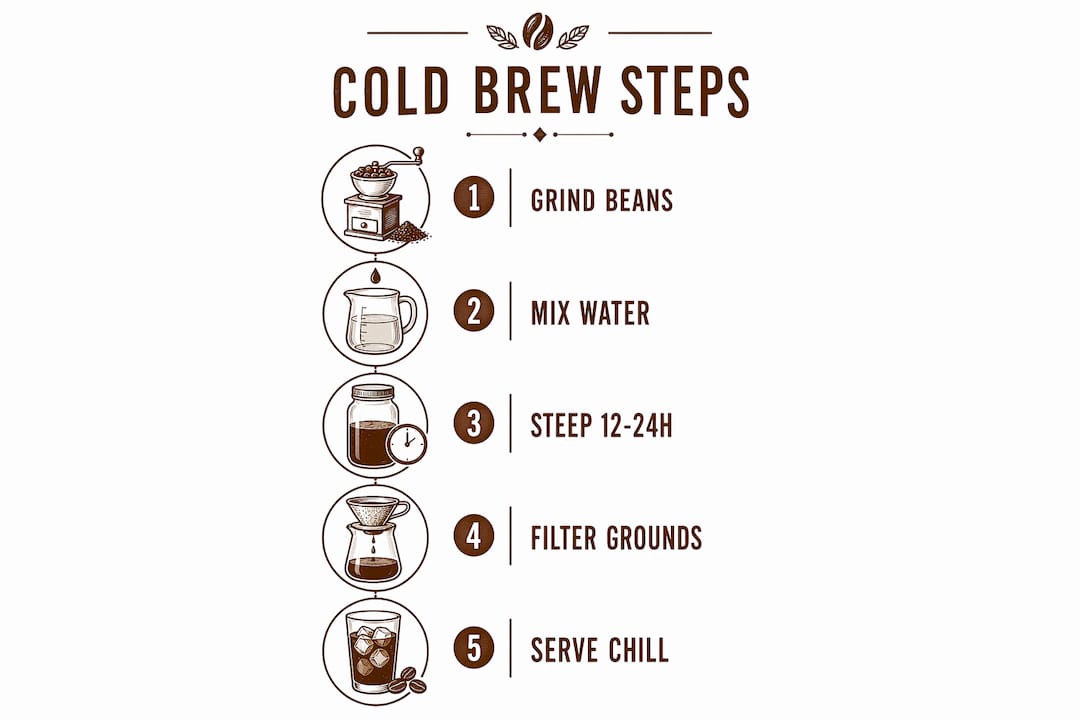
The cold brew process is straightforward. Precision on ratio and patience on steep time are the two variables that separate a great batch from a mediocre one.
The coffee-to-water ratio
Brew ratios commonly range from 1:5 to 1:8 coffee to water by weight. A 1:8 ratio produces a ready-to-drink brew. A 1:5 ratio produces a concentrate you dilute before serving. For most home brewers, starting at 1:8 is the clearest path to a balanced first batch.
For a 32-ounce jar, that means roughly 4 ounces (about 113 grams) of coarsely ground coffee to 32 ounces (about 900 grams) of cold filtered water.
Step-by-step brewing method
- Grind your coffee coarse. Aim for the texture of raw sugar. Weigh it out rather than scooping.
- Add grounds to your jar. Pour them in dry before adding water.
- Add cold filtered water slowly. Pour in a circular motion to saturate all the grounds evenly.
- Stir gently. A quick stir with a long spoon makes sure no dry clumps remain at the top.
- Cover the jar. Use a lid, plastic wrap, or a plate. This keeps the fridge from absorbing coffee odors.
- Steep for 12–24 hours. Steeping at room temperature for 12 hours works. Steeping in the fridge for 18–24 hours produces a cleaner, slightly less intense flavor.
- Filter the brew. Pour through a fine mesh strainer first, then pass through cheesecloth or a paper filter for a smooth, grit-free result. Two-step filtration is the standard for clarity and texture.
- Store in the fridge. Transfer to a clean jar or pitcher. Cold brew keeps well for up to two weeks refrigerated.
Pro Tip: Never press or squeeze the grounds during filtration. Pressing the grounds releases bitter compounds and fine sediment that cloud your concentrate and ruin the smooth texture you worked 18 hours to build.
| Variable | Recommended Range | Effect on Flavor |
|---|---|---|
| Coffee-to-water ratio | 1:5 to 1:8 | Lower ratio = stronger concentrate |
| Steep time | 12–24 hours | Longer = more extraction, risk of bitterness |
| Grind size | Coarse | Finer = over-extraction and grit |
| Temperature | Cold fridge or room temp | Fridge = cleaner, slower extraction |
How do you customize and serve your cold brew?
Cold brew concentrate is the most flexible coffee format you can make at home. The base is strong by design. You build the final drink from there.
Dilution and serving basics
Dilute concentrate at 1 part coffee to 2 parts water or milk before drinking. That ratio gives you a full-flavored cup without the intensity of straight concentrate. Adjust to taste after your first glass.
Serving options worth trying:
- Over ice with filtered water: The cleanest way to taste the coffee itself. Use large ice cubes so the drink does not dilute too fast.
- With whole milk or oat milk: Oat milk adds a natural sweetness that pairs well with medium roast cold brew. Whole milk adds body and richness.
- With a splash of heavy cream: This is the classic coffeehouse style. It creates a layered look and a smooth, indulgent texture.
- Sweetened with simple syrup or agave: Granulated sugar does not dissolve in cold liquid. Simple syrup (equal parts sugar and hot water, cooled) mixes in instantly. Agave works the same way.
Flavor additions that actually work
Cinnamon sticks steeped directly with the grounds add warmth without overpowering the coffee. A strip of orange or lemon zest added during steeping gives a subtle citrus brightness that works especially well with light to medium roasts. Vanilla extract, added after brewing at about half a teaspoon per 16 ounces, rounds out the flavor without making it taste like dessert.
One thing worth knowing: a plain black cold brew has essentially zero calories. Add sweetened condensed milk, flavored syrups, or heavy cream and that number can climb to 250–400 calories per serving. That does not mean avoid additions. It means be intentional about what you add and how much.
What are the most common cold brew mistakes?
Most failed batches trace back to one of four problems. Knowing them before you brew saves you a wasted 18 hours.
- Grind too fine: Fine grounds over-extract and produce a bitter, astringent cup. They also clog your filter and leave sediment in the final brew. If your cold brew tastes harsh, grind coarser next time. For more on fixing bitterness, the Dkbeanleaf guide on bitter coffee causes covers the mechanics clearly.
- Wrong ratio: Too much water relative to coffee produces a weak, watery result. Too little water produces an undrinkably intense concentrate. Start at 1:8 and adjust from there.
- Steeping too long: Anything beyond 24 hours at room temperature risks over-extraction. The coffee becomes bitter and loses its characteristic smoothness. Stick to 18–20 hours in the fridge as your default.
- Skipping the second filter pass: One pass through a mesh strainer leaves fine particles in the brew. Those particles continue to extract in the fridge, making the coffee more bitter over time. Always use cheesecloth or a paper filter for the second pass.
Pro Tip: If your cold brew tastes weak after 18 hours, do not steep longer. Instead, adjust your ratio on the next batch. Steeping past 24 hours rarely fixes weakness and usually introduces bitterness.
Cold brew is also worth understanding in context. Hot brewing extracts more antioxidants like chlorogenic acids than cold brewing does. Cold brew wins on acidity and digestibility, not total antioxidant content. Both methods have real value depending on what you are after.
Key takeaways
Making great cold brew at home requires the right grind size, a consistent ratio, proper filtration, and enough patience to let time do the work.
| Point | Details |
|---|---|
| Grind coarse, always | Fine grinds over-extract and produce bitter, gritty cold brew every time. |
| Start with a 1:8 ratio | This ratio produces a balanced ready-to-drink brew without needing dilution math. |
| Filter twice | A mesh strainer plus cheesecloth or paper filter removes sediment and keeps flavor clean. |
| Never squeeze the grounds | Pressing grounds releases bitterness and clouds your concentrate. |
| Customize after brewing | Add sweeteners, milk, or flavor after filtering to keep the base brew clean and flexible. |
Why patience is the real skill in cold brew
Cold brew taught me something that no other brewing method did: the process is almost entirely passive, and that is exactly where most people go wrong. They rush it.
I spent months tweaking ratios, trying different roasts, and experimenting with steep times before I realized the single biggest variable was not the coffee or the equipment. It was whether I let it steep long enough without touching it. The batches I left alone in the fridge for a full 18–20 hours were consistently better than the ones I checked, stirred, or pulled early.
The other thing I would tell any new cold brew brewer is to start with what you already have. A mason jar and a paper coffee filter will produce a better result than a cheap dedicated cold brew maker with a flimsy mesh basket. Simple tools used correctly beat specialized gadgets used carelessly every time.
Cold brew is also genuinely useful for people who find regular coffee too harsh. The lower acidity is not a marketing claim. It is a measurable difference that shows up in how your stomach feels an hour after drinking it. If you have avoided coffee because it bothers you, cold brew is worth trying before you give up on it entirely.
The best batch you will ever make is the one where you stop overthinking the process and just let time work. Grind coarse, measure your ratio, steep overnight, filter twice, and taste it. Then adjust one variable at a time. That is the whole method.
— Kristopher
Brew better with Dkbeanleaf
If you are ready to take your home brewing further, Dkbeanleaf has you covered from the cup to the coffee itself. The cold brew coffee selection at Dkbeanleaf is sourced with home brewers in mind, giving you a strong starting point for your next batch.

Pair your brew with a white glossy mug that holds up to both cold and hot drinks, or explore the full range of teas at Dkbeanleaf for days when you want something different. Whether you are dialing in your cold brew recipe or just building out your home coffee setup, Dkbeanleaf carries the gear and the goods to make every cup worth waking up for.
FAQ
What is the best coffee-to-water ratio for cold brew?
The most common ratio is 1:8 coffee to water by weight for a ready-to-drink brew. For a concentrate, use 1:5 and dilute before serving.
How long should cold brew steep?
Steep for 12–24 hours. Eighteen to twenty hours in the refrigerator produces the cleanest, most balanced flavor without over-extraction.
Does cold brew have less acid than regular coffee?
Yes. Cold brew is approximately 67% less acidic than hot-brewed coffee, making it a better option for people with acid sensitivity.
Can i use pre-ground coffee for cold brew?
Yes, as long as it is ground coarse. Pre-ground coffee labeled for French press or cold brew works well. Avoid standard drip grind, which is too fine.
How long does homemade cold brew last in the fridge?
Cold brew stored in a sealed jar or pitcher keeps well for up to two weeks in the refrigerator. Concentrate may last slightly longer than ready-to-drink batches.