

Make Cafe Quality Espresso at Home in 2026
Café-quality espresso is defined by four measurable qualities: balanced flavor, a thick golden crema, full body, and a clean aroma that lingers. You can make cafe quality espresso home without spending thousands of dollars on a commercial machine. The real drivers are grind consistency, dose accuracy, extraction time, and bean freshness. Get those four variables right, and your kitchen shots will rival what a trained barista pulls. This guide walks you through every step, from choosing equipment to fixing your first bad shot.
What does it take to make cafe quality espresso at home?
The standard for café-quality espresso is well established. The classic brewing target is an 18g dose producing 36g of espresso output, extracted over 25–30 seconds under 9 bars of pressure at 200°F (93°C). That 1:2 brew ratio is the foundation every professional barista works from. Hitting it consistently at home is entirely achievable with the right setup.
The biggest misconception home baristas carry is that the machine does most of the work. Espresso quality depends more on a high-quality burr grinder and fresh beans combined with a mid-range machine than on an expensive machine paired with a poor grinder or stale coffee. A $1,500 machine fed stale, pre-ground coffee will produce a flat, bitter shot every time. A $400 machine with a quality grinder and fresh beans will produce something genuinely excellent.
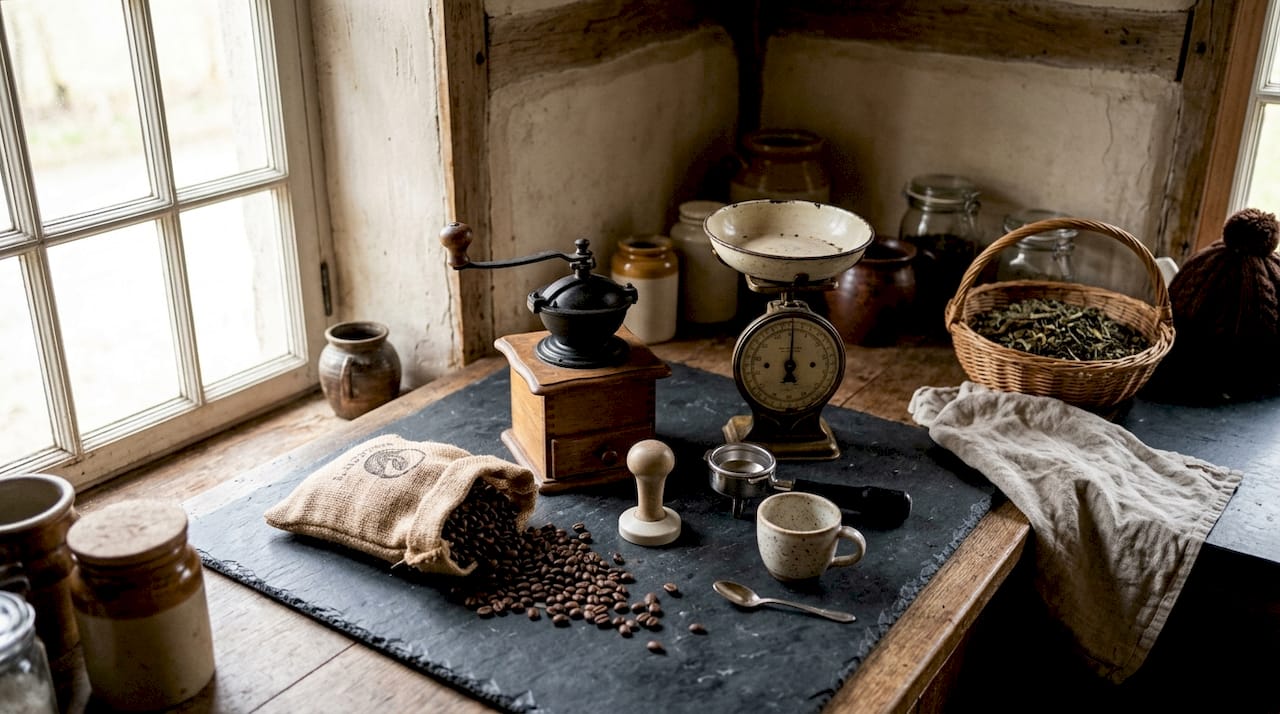
Bean freshness is the variable most home baristas underestimate. Beans used 7–21 days post-roast produce the best flavor and crema. Beans older than 30 days deliver flat, muted shots regardless of how well you grind or tamp. Check roast dates before you buy, and read up on freshly roasted coffee to understand why that window matters so much.
Essential equipment for brewing espresso at home
The right tools make consistency possible. Without them, you are guessing on every shot.
Espresso machine
Machines below about $200 often fail to maintain stable brew temperature, which makes dialing in espresso nearly impossible. A machine with a PID temperature controller holds water at a precise temperature throughout extraction. That stability directly affects flavor. Budget at least $300–$400 for a machine that delivers reliable 9-bar pressure and temperature control.
Burr grinder
A burr grinder with stepless micro-adjustment is non-negotiable. A grinder lacking stepless micro-adjustments can make it impossible to fix extraction problems regardless of skill level. Blade grinders produce uneven particle sizes that cause channeling and inconsistent extraction. Invest in a quality burr grinder before upgrading your machine.
Precision scale
A digital scale accurate to 0.1g is the most impactful upgrade for shot consistency over machine improvements, and it costs between $15 and $150. Weighing both your dry grounds and your liquid output removes guesswork entirely. Volume measurements with a spoon are unreliable because coffee density varies by roast level and grind size.
Water quality
Filtered water with a TDS around 75–150 ppm is ideal for home espresso. Hard tap water causes scale buildup in your machine and mutes delicate flavors in the cup. Soft water extracts unevenly and produces thin, sour shots. A basic water filter pitcher solves both problems at low cost.
| Equipment category | Key feature to prioritize |
|---|---|
| Espresso machine | PID temperature control, 9-bar pump |
| Burr grinder | Stepless micro-adjustment, consistent particle size |
| Digital scale | 0.1g accuracy, fast response time |
| Tamper | Flat base matching basket diameter exactly |
| Water source | Filtered, TDS 75–150 ppm |
Pro Tip: Buy your grinder before upgrading your machine. A quality grinder paired with a mid-range machine outperforms the reverse combination every time.
How to brew espresso at home: step by step
Consistency comes from repeating the same physical sequence every shot. Vary the process and you lose the ability to diagnose problems.
-
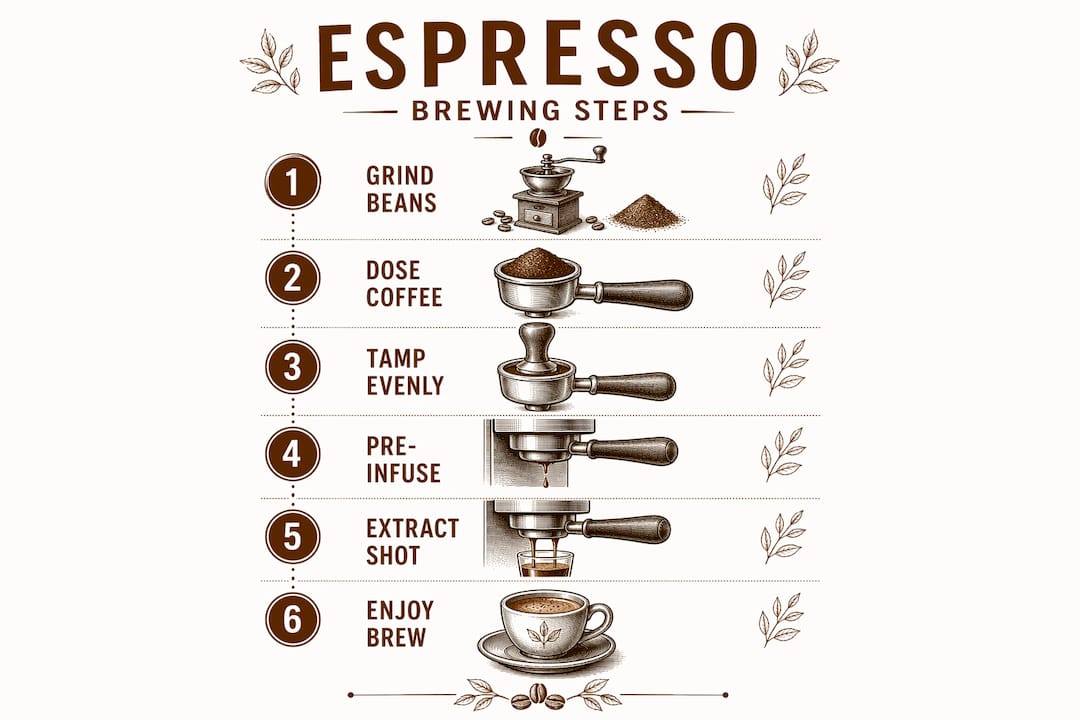
Preheat your machine and group head. Run a blank shot of hot water through the group head for 30 seconds before brewing. Cold metal drops extraction temperature and produces sour, underdeveloped shots.
-
Weigh your dose. Measure 18g of whole beans directly into your grinder. Use your 0.1g scale for every shot, not a scoop.
-
Grind fresh. Grind directly into the portafilter basket. Grind only what you need for that shot. Pre-grinding even 10 minutes ahead allows CO2 to escape and flavor to fade.
-
Distribute evenly. Use a finger or distribution tool to level the grounds before tamping. Uneven distribution creates high and low spots that water exploits, causing channeling.
-
Tamp with consistent pressure. Press straight down with approximately 20–30 lbs of force. Tamping pressure beyond about 20 lbs does not compress coffee further. Level and consistent tamping matters more than force. A crooked tamp causes channeling every time.
-
Lock in the portafilter and start extraction. Begin timing immediately. Watch for the first drops to appear within 5–8 seconds.
-
Stop at your target yield. Stop extraction when your scale reads 36g of liquid espresso. Check your total time. A well-extracted shot finishes in 25–30 seconds.
-
Observe the flow and crema. Healthy espresso flows in a thin, steady stream that looks like warm honey. The crema should be thick, reddish-brown, and cover the surface of the shot. Pale, thin crema signals under-extraction. Dark, bitter crema signals over-extraction.
Pro Tip: Keep a small notebook next to your machine. Write down grind setting, dose, yield, and time for every shot. Patterns become obvious within a week, and you will dial in twice as fast.
How do you dial in espresso and fix common flavor problems?
Dialing in espresso means adjusting variables until your shot hits the target parameters and tastes balanced. The rule is simple: change one variable at a time. Change two things at once and you cannot identify which one fixed or broke the shot.
Grind size is your primary dial. Finer grinds slow extraction and increase strength. Coarser grinds speed extraction and reduce strength. Start there before touching dose or yield.
- Sour or sharp taste: Extraction ran too fast or too short. Grind finer, or extend your yield slightly.
- Bitter or harsh taste: Extraction ran too long. Grind coarser, or reduce your yield.
- Watery or thin body: Dose is too low, or grind is too coarse. Increase dose by 0.5g or grind finer.
- Flat with no crema: Beans are likely stale. Check the roast date. Beans past 30 days produce almost no crema.
- Uneven flow or spurting: Channeling caused by uneven distribution or a crooked tamp. Redistribute and re-tamp.
The pre-infusion phase of 3–5 seconds at low pressure before full 9-bar extraction reduces channeling and improves extraction evenness. This technique is especially useful with lighter roasts, which are denser and harder to wet evenly.
| Problem | Likely cause | Fix |
|---|---|---|
| Sour, sharp flavor | Under-extraction, fast flow | Grind finer, check tamp level |
| Bitter, harsh flavor | Over-extraction, slow flow | Grind coarser, reduce yield |
| Watery, thin body | Low dose or coarse grind | Increase dose by 0.5g |
| No crema | Stale beans | Use beans 7–21 days post-roast |
| Channeling, uneven flow | Poor distribution or tamp | Redistribute, tamp level |
Explore espresso flavor profiles to sharpen your ability to identify what you are tasting and why.
Common mistakes home baristas make and how to avoid them
Most home baristas plateau not because they lack skill, but because they repeat the same errors without recognizing them. These are the most common ones.
- Skipping the scale. Eyeballing dose by volume produces wildly inconsistent results. A 1g difference in dose changes extraction time by several seconds.
- Using pre-ground or stale coffee. Pre-ground coffee loses most of its volatile aromatics within 15 minutes of grinding. Stale beans produce flat, lifeless shots. Always grind whole beans fresh before each shot.
- Changing multiple variables at once. Adjusting grind size, dose, and tamp pressure in the same session makes it impossible to identify what changed the shot. Fix one thing, pull a shot, evaluate, then adjust again.
- Neglecting machine and grinder cleaning. Coffee oils go rancid within days. A dirty group head or grinder burrs add bitter, stale flavors to every shot. Backflush your machine weekly and clean your grinder burrs monthly.
- Expecting fast results. Expect to pull 15–30 shots before a new bean or grinder setting feels dialed in. That is not failure. That is the process.
Pro Tip: Store your beans in an airtight container away from light and heat. Read Dkbeanleaf’s guide on storing coffee beans to extend your freshness window without a vacuum canister.
Avoiding these common brewing mistakes cuts weeks off your learning curve. Most problems trace back to measurement, freshness, or cleanliness, not technique.
Key Takeaways
Brewing café-quality espresso at home requires fresh beans, a quality burr grinder, a 0.1g scale, and consistent technique built around the 18g dose, 36g yield, 25–30 second extraction standard.
| Point | Details |
|---|---|
| Grinder over machine | A quality burr grinder with micro-adjustment matters more than an expensive espresso machine. |
| Bean freshness window | Use beans 7–21 days post-roast for the best crema and flavor; discard anything past 30 days. |
| Standard brew parameters | Target 18g dose, 36g yield, 25–30 second extraction at 9 bars and 200°F. |
| One variable at a time | Change only one brewing variable per shot to diagnose and fix flavor problems accurately. |
| Scale is non-negotiable | A 0.1g digital scale costing as little as $15 delivers more consistency than any machine upgrade. |
Why your grinder matters more than you think
I have watched home baristas spend $1,200 on a new espresso machine and still pull sour, inconsistent shots. The machine was not the problem. The grinder was. A blade grinder or a cheap burr grinder with only stepped adjustments cannot produce the particle consistency that espresso demands. You can have perfect technique and the freshest beans in the world, and a bad grinder will still ruin the shot.
The other thing I have seen trip people up is impatience with the dial-in process. Home baristas pull two bad shots, declare the beans are bad, and buy something new. The beans are usually fine. The grind setting is off by one click. Slow down, take notes, and trust the process. The one-variable rule feels tedious until the day it saves you from throwing out a perfectly good bag of coffee.
Fresh beans matter more than most people realize, and the difference is not subtle. A shot pulled from beans roasted 10 days ago versus beans roasted 45 days ago tastes like two completely different coffees. The fresh shot has sweetness, complexity, and a thick crema. The old shot is flat and bitter no matter what you do. Buy fresh, buy whole bean, and grind right before you brew. Those three habits alone will get you 80% of the way to café quality.
The learning curve is real, but it is shorter than most people expect. Give yourself 30 shots with a new setup before you judge it. Keep notes. Taste critically. The feedback loop is fast once you start paying attention.
— Kristopher
Gear up your home espresso setup with Dkbeanleaf
Great espresso starts with great ingredients, and Dkbeanleaf carries everything you need to build a setup worth pulling shots on every morning.

Dkbeanleaf offers freshly roasted coffee beans sourced for home espresso, along with a curated selection of accessories that make precision brewing easier. Pair your shots with a white glossy mug built for the full café experience at home. If you want something beyond coffee, the Dkbeanleaf tea collection brings the same quality focus to loose-leaf and specialty teas. Browse the full Dkbeanleaf collection at dkbeanleaf.com and find the beans, gear, and accessories that match where you are in your espresso practice.
FAQ
What is the standard espresso brewing ratio?
The standard espresso ratio is 1:2, meaning 18g of ground coffee produces 36g of liquid espresso. Extraction should take 25–30 seconds at 9 bars of pressure and 200°F.
How fresh do espresso beans need to be?
Beans used 7–21 days after roasting produce the best flavor and crema. Beans older than 30 days deliver flat, muted shots with little to no crema.
Does grind size really affect espresso that much?
Grind size is the primary variable controlling extraction speed and flavor. A grind that is too fine causes over-extraction and bitterness; too coarse causes under-extraction and sourness.
How much tamping pressure do I need?
Approximately 20–30 lbs of pressure is sufficient. Consistent, level tamping matters far more than the amount of force applied.
How long does it take to dial in a new espresso setup?
Expect 15–30 shots to dial in a new bean or grinder setting. Changing one variable per shot and keeping notes cuts that number significantly.